IN THIS ARTICLE
Organization owners and managers have the ability to create and manage join request links. Join request links allow you to set up a place where prospective members and collaborators can go to request to join your organization without having to know their email addresses.
Viewing Join Request Links
The following steps describe the process for viewing join request links within an organization and accessing the join request link management controls (if you are an owner or manager of the organization to which the user belongs).
-
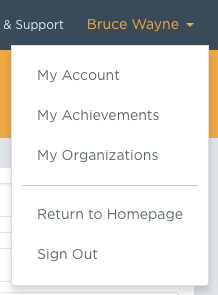
In the top right corner of ProKnow, click your profile name, then click My Organizations:
-
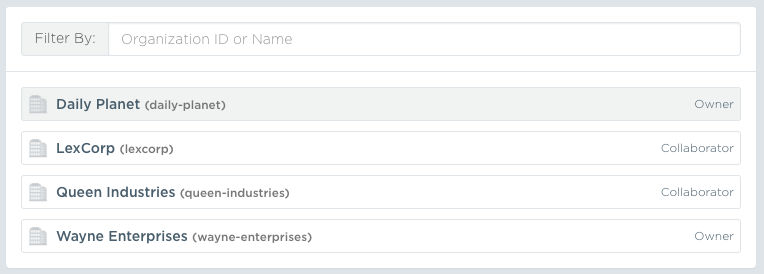
From the My Organizations page, click on the particular organization that you wish to manage:
-
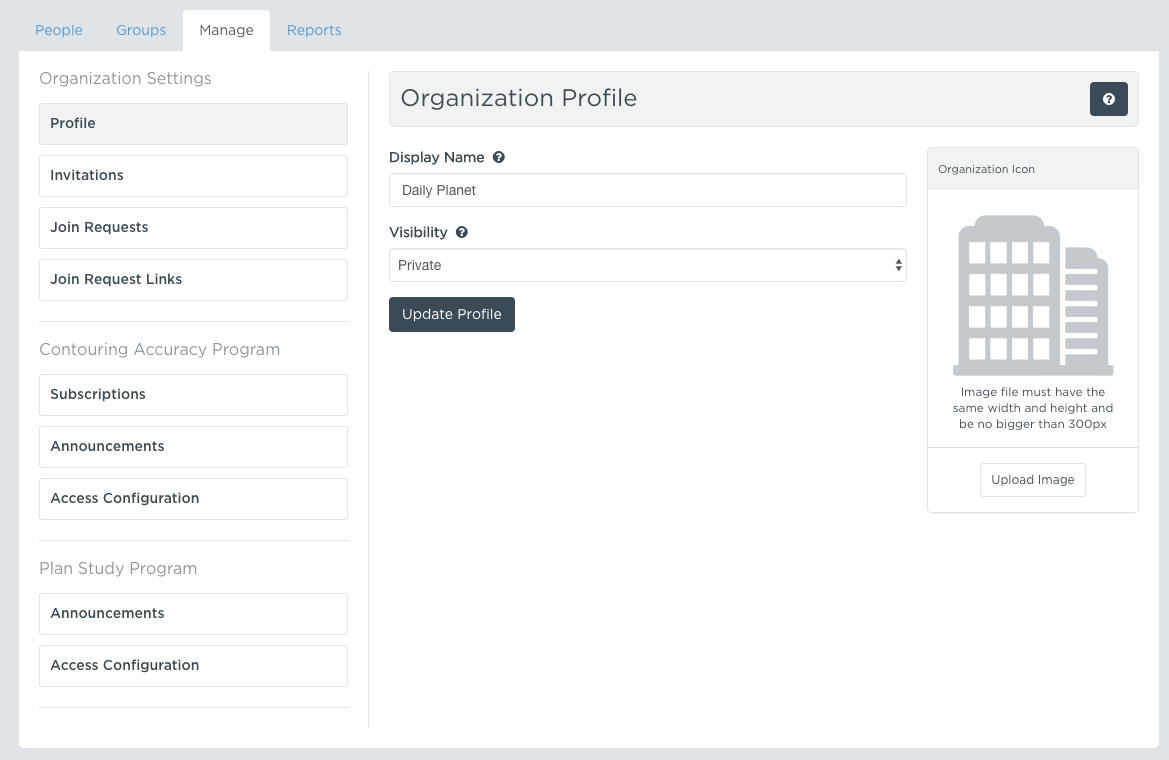
From the organization page, click the Manage tab to access the management panel:
-
From the Manage tab, click the Join Request Links category under Organization Settings.
Creating Join Request Links
Organization owners and managers can create join request links, which can then be shared with prospective members and collaborators. The following steps describe the process of creating a join request link:
- Begin by following the instructions for Viewing Join Request Links. This will take you to the Join Request Links panel under the Organization Settings section.
- From the Join Requests Links panel, press the Create Link button.
- Provide a description of the link in the field provided. This field is required.
- Select either the Member or Collaborator radio button. Users who request access via this link will assume the role you select.
-
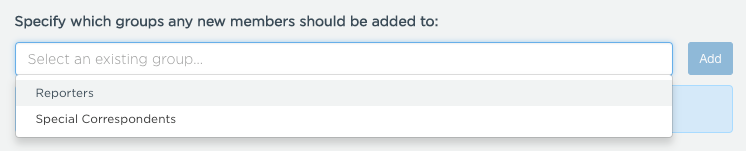
You can choose to add the users to one or more existing groups within the organization. To accomplish this, click on the Select an existing group... dropdown and click on the group to which you wish to add the user.
-
Once selected, make sure you click the Add button to add the group to the list.

- Specify who should be notified when users request to join via the link. Select either All Owners and Managers, Specific Owners and/or Managers, or Nobody.
-
If you choose Specific Owners and/or Managers, you can add owners and/or managers to the list by clicking on the Select an existing owner or manager... dropdown and selecting the user you want to add to the list.

-
Once selected, make sure you click the Add button to add the user to the list.

Editing Join Request Links
Organization owners and managers can edit join request links. The following steps describe the process of editing a join request link:
- Begin by following the instructions for Viewing Join Request Links. This will take you to the Join Request Links panel under the Organization Settings section.
- From the Join Requests Links panel, press the Edit link for the join request link you wish to edit.
-
In addition to the fields discussed in the instructions for Creating Join Request Links, you may also toggle whether the link is inactive using the Active switch. Click the switch to toggle the active state.

- Once you are finished updating the link, press the Save button to save your changes.
Viewing Join Requests
The following steps describe the process for viewing join requests from users who have used a join link to request to join your organization.
-
In the top right corner of ProKnow, click your profile name, then click My Organizations:

-
From the My Organizations page, click on the particular organization that you wish to manage:

-
From the organization page, click the Manage tab to access the management panel:
-
From the Manage tab, click the Join Requests category under Organization Settings.
Accepting a Join Request
Organization owners and managers can respond to join requests by either accepting or rejecting them. Both accepting and rejecting join requests will notify the user. The following steps describe the process of accepting a join request:
- Begin by following the instructions for Viewing Join Requests. This will take you to the Join Requests panel under the Organization Settings section.
- From the Join Requests panel, click on the Accept link for the request you wish to accept.
-
Press the Accept button to confirm.
Rejecting a Join Request
Organization owners and managers can respond to join requests by either accepting or rejecting them. Both accepting and rejecting join requests will notify the user. Users will be prevented from reissuing rejected requests. The following steps describe the process of rejecting a join request:
- Begin by following the instructions for Viewing Join Requests. This will take you to the Join Requests panel under the Organization Settings section.
- From the Join Requests panel, click on the Reject link for the request you wish to reject.
-
Press the Reject button to confirm.
Dismissing a Join Request
To remove a join request from the system, it may be dismissed. Note that dismissed join requests are not recoverable, however, the users may choose to reissue a dismissed request.
- Begin by following the instructions for Viewing Join Requests. This will take you to the Join Requests panel under the Organization Settings section.
- From the Join Requests panel, click on the Dismiss link for the request you wish to dismiss.
-
Press the Dismiss button to confirm.
Comments
Article is closed for comments.